If you’re having trouble making it in the Commonwealth of Fallout 4…
…you’re far from alone on that one. There’s a lot of people out there who are already kind of burned out on the game with the sheer amount of things you can do. It’s kind of overwhelming. I totally agree with you! That’s why I came up with a rather handy-dandy guide so you can get a leg up on the terrible atrocities of the Commonwealth so that way you can get the most out of your Fallout 4 experience.
Combat Tips and Tricks
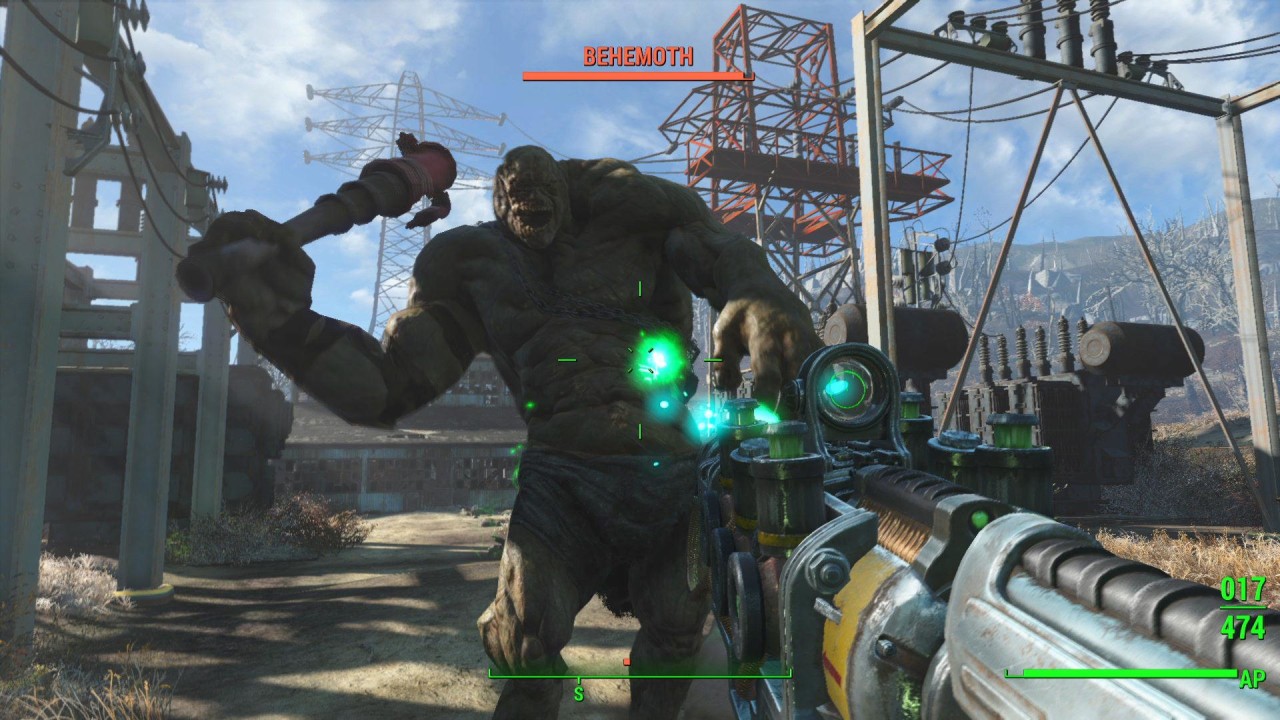
One of the first things you’re going to end up doing is fighting something. You might get through the first scraps okay but in order to go up against dangerous encounters you’re going to need to know just a little more to get you through. You could truly play the combat part the way you want, either by going through V.A.T.S. – an alternative to your usual FPS combat that allows you to pick an area to shoot for and gives you a rating based on how likely you are to hit it that serves as a pretty awesome throwback to the earlier entries of the game- or by playing the game like your typical shooter. One of the most basic concepts you should get is how shooting works in Fallout 4: no shots go directly straight indefinitely. Much like real life, shots will deviate or weaken over the distance they are shot and what affects that depends on what kind of weapon you’re using, the ammunition you’re using, modifications, and various other things. This applies no matter which way you play the game so don’t feel like you have to shoot down the sights or go directly to V.A.T.S. in order to be more accurate; things are still very number and status based and with weapon modification being amplified in this game, that’s more relevant than ever.
One thing that’s incredibly relevant when engaging in combat in this game is that you should always keep distance between yourself and your enemies. You should only ever use melee weapons when you are extremely low on ammunition or when you’re absolutely positive you outclass the enemy and you’re out to have some fun at the expense of some ghouls or something. A lot of enemies that you encounter will swarm you and it’s very easy to get outnumbered, overwhelmed, or otherwise in a position where you have very little time to react so when you’re in a place you’re new to, always keep your eyes and ears open for an enemy; a good way to do that is to be checking V.A.T.S as you go along. Another things of note to prepare for is small spaces – there are a lot of them and, quite often, you can use the distance between yourself and the enemy to your advantage: even better, there will be a lot of instances where the enemies placed in an area are larger than the openings to other rooms or can’t fit themselves down stairways or in nooks and crannies and you can place enough distance and objects between you and the target that you could often dispatch enemies you would otherwise have a lot of trouble with.
So, now that you’re putting yourself in good combat situations, you wanna know how to arm yourself to take on certain baddies, right? Good thinking. There are three main types of damage and status effects that affect health: the three main types of damage relate to the types of ammunition the gun uses and status effects are usually the result of modifications to the weapon. Your main types of ammunition damage are as follows: ballistic, which is the most common, from bullets, grenades, and can be looked at as basic physical damage; radiation, which is shot from gamma weapons and soaked up from the environment and decreases your maximum hit points; and finally, energy which is fired from, you guessed it, energy-based weapons that often have status effects attached to its regular damage. There’s about three status effects you’re going to come across most commonly and that’s electrifying, burning, and poison damage, all of which are pretty self-explanatory.
When considering what to bring with you, you should always keep your options open and make sure your arsenal accounts for different situations. Remember, there are many different types of enemies out there: for example, ghouls and super mutants aren’t as affected by radiation and synths won’t take any radiation on at all and will be less affected by burning or energy damage. Enemies with high defense on most of their bodies, like mirelurks, will take less ballistics damage and will sometimes reflect energy damage. Always, always, always keep a varied arsenal with you but make sure you have a ballistic and melee weapon you favor with you at all times as it’ll be responsible for most of your damage.

Questing Tips and Tricks
One thing you’ll have to realize when playing this game that you’ll almost always have a short list of quests to accomplish so learning how to pick and choose your quests is particularly important. A large amount of quests, early on, will have you dealing with a small settlement of raiders, super mutants, or synths, especially as far as the Minutemen quests are concerned, as they are usually involving you clearing out an area so you can start a settlement of your own. Always go into these generally garden variety quests with the idea that anything can be possible because even if the quest description, for example, says that you’ll only be dealing with raiders, you may be set upon by gunners and mutated creatures, possibly, as well, and they might even fight it out among one another, so don’t over prepare for these kinds of quests but don’t go into it without preparing yourself at all. A lot of these settlements may be well defended. A good majority of these basic quests will be settlement or faction-related.
Of course, the main story-based quests are where you’re going to find the greatest variety in terms of what you’re up against and what to expect but, with that in mind, it also gives you the biggest heads up as to what to expect before you dive in. While you may not know the exact layouts of locations or the exact enemies you’ll be facing, you’ll be aware of the danger you’ll be facing. Take these with the greatest caution because some of the challenges faced in these quests may be subtle and they may be obvious but they’ll almost always give you an angle to play it safe.
One last thing about quests is that you shouldn’t feel under any pressure to complete them in any particular order or time constraint. Up until this point of playing, of which I’ve not finished the main story but I feel I’ve completed a large amount of side quests, I’ve not run into a single spot where you were told you must go and do this one thing at this particular moment. It was very liberating compared to other games that have been coming out for the last so many years.

Perks Tips and Tricks
This is where things get kind of hairy but my best advice to you is to take a quick inventory of the entire perk chart when you first get the chance so you know all of what’s available. Know, in your mind, how you’d like to play the game, that way, as you’re gaining levels, you know exactly where you want to put your points and the only decisions that will need to be made will be what times you get certain perks. One of the big things you should know is that while some of these boost your stats, combat abilities, and generally make playing the game easier in certain respects, certain actions, abilities, and crafting are only available if you get certain perks and there are no ways around that. Good examples are lock picking, hacking, armoring, blacksmith, and the likes of those, where you can’t get certain abilities without them, so keep in mind, allocate your perk points wisely.
For example, in combat, I like to let my companion soak up as much damage as possible while I serve up as much long range damage as possible. When things get hairy, I throw some grenades out and turn tail if that doesn’t stop them. Those long distance weapons have to be as destructive and as accurate as possible and if I need to make a hasty escape, my armor needs to be lightweight and protective as possible so crafting is super important as well. Looting, by proxy, is super important so putting points into lock picking and hacking is a must and, well, you can kind of see where I’m going from here. I chose perks to accommodate my style of play and that’s exactly how you should choose, too!
Settlements Tips and Tricks
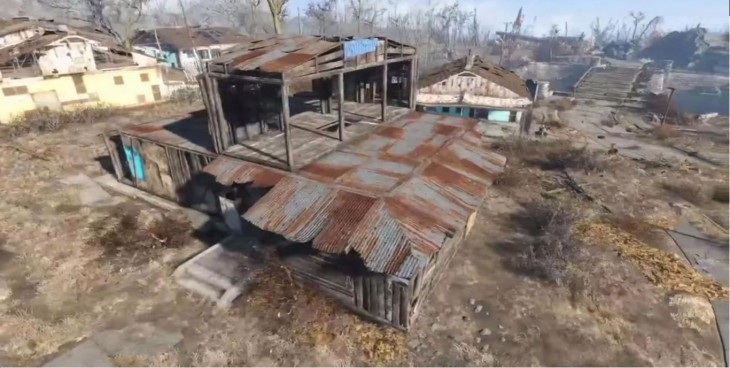
Settlements are perhaps the most overwhelming and completely creative thing you can do. Unfortunately, you’re almost completely left in the dark when it comes to how it’s done properly. Sad thing is, is that it’s actually relatively simple. You hold on to residents by keeping them happy, you bring in new residents either by sending people there or making your settlement appear approachable. It may seem like I’m oversimplifying it, especially if you’re asking one of the boys from Penny Arcade, but it really is quite that simple. You just gotta break things down.
Probably your first and foremost concern is making sure there is enough food and water for potential settlers to come in. This part is simple enough because you can put crops and water pumps just about anywhere in the dirt of your settlement and you don’t need anything additionally. Once you have a good staple to get started – think of things this way, you want 1 point of food and water for every settler you want to attract – you can move on. Use this time to get a feel for how to place things and use the builder mode of the game. It’s a little unrealistic in how things are placed but it works well once you get the hang of it.
After that, you need to deal with bedding and defense – you can do a majority of these much like you did the water pumps and the crops, however the placement is a lot more varied as you can place them just about anywhere. Again, you’ll want to look at it as one point towards each for every potential citizen you want to bring in but defending your settlement will take a little more coordination and will be the first thing that complicates matters for you. What you’ll want to do first is consider the area and base structures of your settlement and how things have been placed so far: you’ll have to think about keeping your resources defended, first and foremost; next up comes your people, so wherever they would be stationed or sleeping, make sure that’s defended as well; last of all, you should be putting up some forward, perimeter defenses, to alert everyone that enemies are coming in and get everything prepared. How well you defend your settlements also challenges your antagonists, as well, as they keep coming and bigger and badder enemies eventually come. In my time with the game – about 30-40 hours, at least – I’ve only faced up against squads of super mutants and raiders. My Red Rocket Truck Stop, though, is incredibly well defended, though, to be fair.
When you get the hang of all of that and you have some happy settlers in your settlement, you can start messing with the advanced stuff: you’ll notice that while you’re in building mode, you can break down debris and objects on the ground for building materials, you’ll notice the types of materials you’ll have to keep an eye out for; you’ll find that certain items require powering; you’ll also notice that some items need to be placed directly in water. The biggest complication out of everything, I find, it powering items that require it: first off, you’re going to need to build a generator of some kind to act as a source and then you’re going to need to string wire along to keep everything connected. The complicated part comes when you try and figure out how to power everything: some objects need a direct line of power whereas some objects only need to be near a line of power or a connected power node in order to come on. It would seem that in the builder mode description of said items, the ones that have a numbered power demand require a direct connection whereas those that do not have a numbered power demand only require being near a node or a line. Keep in mind that you’ll need one piece of copper for each power line and each line will only stretch so far!
Breaking down materials is a great way to clear up your settlement so you can lay things like shelters and such out as well as getting some very basic building materials like cement, steel, wood, and the like. Everything beyond this point is merely aesthetics and I would hope that by this time you would have a good feel as to how to bring everything together. After that, you need to keep in mind a couple more things: supply lines and Workshops and how material distribution can be handled using them. Really depends on whether or not you want to create a network of people between your settlements distributing supplies and materials for you and taking up space doing nothing at your settlements or using the Workshops at each settlement to do the process yourself which, honestly, isn’t much more on the tedium scale.
So that pretty much wraps up a lot of the general stuff you’ll come across while roaming the Commonwealth; if you have anything you’d like to see added, discussed, or changed, let me know in the comments section as I do plan on revisiting this as I continue playing the game!
Leave a Reply
You must be logged in to post a comment.